
|
This page is protected to avoid unnecessary edits. If you want to have something changed, please discuss this on our Discord server.
|

|
The following tables are the unofficial Dead Ahead: Zombie Warfare units tier list. It was compiled by wiki staff, with extra input from our Discord members.
The purpose of these lists is to give an insight on how well each individual unit works when compared to their alternatives. It doesn't takes team powers into account, and only considers unlock requirements when it's actually relevant. Because of this, when it comes to choosing what unit to buy, it's best to refer to strategy guides, or consult pages of each individual unit.
The main criteria of ranking units are based on:
- General performance during gameplay;
- How well they perform without buffs;
- The part of the game at which a unit becomes available (early missions, late stages, etc.);
- Reliance on upgrades and/or special abilities.
The list is always open for updates. They can be caused by significant nerfs/buffs, gameplay changes, or sudden discoveries made by community members. Bugs and glitches, however, don't affect tiering.
The tier list focuses on performance in regular missions only. Due to gameplay differences in events, they all require specific units that are chosen without taking these ranks into account.
There are no rankings provided for Skirmish, and no plans to ever make a tier list for it. This is due to units in PvP heavily relying on multiple intertwined parameters, those being: deck formations, team powers, overly dominant meta options, and a need for potentially unorthodox item builds. Those factors prevent units from being properly evaluated without causing overcomplications.
Tiers Explanation
- S – All around good units with little to no flaws. They work in every team, and there are almost no reasons to use anyone instead of them.
- A – Solid units who can prove useful throughout the entire game, but still have some flaws or are outclassed by S tiers.
- B – Decent units who can be used for a large portion of the game, but tend to have downsides that bring their potential down.
- C – Units who are only consistently useful throughout a third of the game. They might have something great to offer but it requires a lot of effort to use effectively, or is held back by multiple issues.
- D – Units who aren't strong enough to be used for missions completion, but are not entirely unplayable.
- E – Units who have only very niche uses, and even then get outclassed most of the time.
- F – Units in this category are considered borderline useless. There's no point in using them for campaign progression, and even casual replays, due to their impracticality and major flaws.
The leftmost unit is considered the top of its tier. Respectively, the rightmost is considered the bottom of its tier.
Rankings
| Unit
|
Notes
|

Turret
|
Turret's very high DPS and ability to be placed virtually anywhere make it a very efficient stationary unit for both offense and defense. While it has long preparation time and high rage cost, its damage output makes it a near-essential rage ability to use throughout later stages of the game.
|

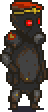
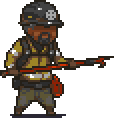
Red Barrel
|
A direct upgrade to Empty Barrel, Red Barrel is a very versatile unit, as it can be used in a variety of ways thanks to its high health, ability to manually detonate, and leaving behind a fire pool upon destruction. While it might not have anywhere close to the drop damage as its empty predecessor and slightly higher rage cost, its better protective capabilities and overall higher damage output cannot be overstated.
|

Private Rodriguez
|
Being a direct upgrade of his younger brother, Private Rodriguez is a notable step up from Redneck, providing overall greater damage output, and invaluable support in form of knockback. Being a spam unit makes all these advantages shine even brighter for Private, as he is able to enable strong pushes on enemies for dirt cheap, aiding his teammates a lot. There's little reason to use any other fighter over him.
|
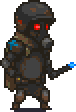
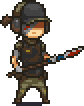
Rogue
|
Even without considering that he is a direct upgrade of Jailer, Rogue's extremely high base damage makes him one of the best burst units in the game. Not only that, it's possible for him to temporary stunlock units, should he get lucky with his strikes. He is only held back by his moderate courage cost and preparation time, which become downsides in certain situations most other fighters prove to be of greater help in. It doesn't helps that he also suffers from having the lowest base agility in the game, meaning you need to properly balance his stats to achieve tolerable results. But regardless, if you are willing to achieve a perfect balance of stats on him, Rogue's best qualities will prove powerful in combat.
|
| Unit
|
Notes
|

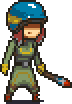
Sonya
|
Sonya can be considered possibly the best unit with the high rate of fire perk as she supersedes her predecessors by a number of factors: she has fairly high DPS thanks to her swift firing pattern and reload speed, and just the right level of accuracy which allows her to provide crowd control while still exceling at bursting down single targets. However, the real reason Sonya proves to be so versatile is thanks to her great generalistic stats: she has high health for a ranged unit, fast movement speed, and her critical melee hits knock enemies back, saving her life more often than not. Even though the last part requires to boost Sonya's crit. chance, this proves to be a blessing in disguise, as using crit. builds boosts her offensive abilities even further. Sonya's only problem is that she has mere 60 base agility, which means that it's impossible to achieve her highest potential in terms of stats without making a sacrifice to her reliability.
|

Carlos
|
Carlos can be safely used throughout almost the entire game, as he has one of the highest damage outputs among all shooters, thanks to his shooting pattern and long firing period. The latter is especially notable, as it means that Carlos is capable of simultaneously dealing loads of damage to a single target and provide a level of crowd control. His low courage cost also contributes to his easy playability. Unfortunately, Carlos' low health and lack of defensive skills hinder his performance in later parts of the game. His long reload time can also screw him over in some cases, usually because of his aforementioned non-existant protection.
|

Mechanic
|
The main source of appreciation for Mechanic lies in his unique perk. Since he can knock enemies back, and his sledgehammer is a guaranteed critical with an extra multiplier, he can be used as either a burst damager, or an extra source of push force. Both approaches provide valuable aid to Mechanic's teammates, although their usefulness varies from mission to mission. The unit is also held back by his moderate preparation time, which can prove to be a major hinderance, to the point that you are better off using a different fighter.
|
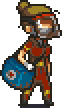
Paramedic Nancy
|
The reason Nancy is praised so highly is because her ability to revive units has proven to be that great. It's very resource efficient, as for a cost of 30 courage Paramedic is capable of reviving units worth much more than that in total, and do it instantaneously, allowing players not to worry about the cooldowns, and act like nothing had happened. She can also ensure that some of them won't die right after revival, however that can be a drawback, since Nancy locks onto a single injured unit and might ignore anyone who faints at that time. Her lightning attack during transformation into E.M.T. is also a double-edged sword, since it can damage friendly units too, wasting all work she's just done. Overall, Nancy's "white mage" design makes her an incredibly powerful support unit, but she still has her significant drawbacks, and so is far from a perfect unit.
|
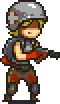
Ranger
|
Ranger can be considered a quicker alternative to Policeman Diaz – he doesn't have as much health and lacks any meaningful protective perks, but he compensates for that by having notably higher movement speed and a more reasonable courage cost. Those simple upsides have proven to make him a much more versatile option, being consistently good at all things a shotgunner should excel in, while not suffering from the class' downsides too much. While he and Diaz can be both considered versatile ranged units, Ranger still has a little edge over the cop through his better ability to respond to critical situations.
|
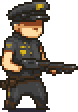
Policeman Diaz
|
Policeman Diaz is among the tankiest units in the entire game, thanks to his very large health pool for a ranged unit and a uniquely high level of melee resistance. Since almost all zombies rely on melee attacks, this allows Policeman to come out alive out of almost every encounter, sans a few very extreme situations. Unfortunately, Diaz hulking health is all there really is to him, as the universal downsides of shotgunners massively curb his potential for greatness; not to mention his hefty courage cost. Regardless of that, he is still capable of showing a consistently good performance, as long as your are willing to work around his downsides.
|
| Unit
|
Notes
|

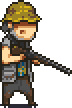
Lester
|
Since Lester is identical to Farmer in terms of virtually everything, he has the same pros and cons as his year-round available predecessor. However, his DPS is slightly higher as he has a noticeably faster firing speed and reload time. This proves to be a game changer in combination with his special ability, especially in later missions where high DPS is very important. If you manage to compensate for his low health, Lester's damage output will prove to be handy.
|

Redneck
|
Even though he is the very first unit in the game, Redneck has a surprisingly high potential as he is a great spam unit, having very short preparation time and decent damage output. Although he is fairly reliable, at some point his lack of abilities and resistances will become harder to ignore. However, it's still realistic to complete the entire campaign with him always being a part of your team, thanks to his spammability making him a good meat shielder and a quick responder to critical situations – all feats that are valuable during the last stretches of the game.
|

Medkit
|
Medkit is a great support tool to use thanks to its ability to heal human units within its radius, helping to keep them on their feet. Its healing effect can also help mitigate the damage caused by fire or poison. While it can be helpful in nearly any mission, it's not that useful during ones where units are expected to die easily or where offensive rage abilities prove to be better for support.
|
Dr. Kane
|
The reasoning behind Dr. Kane's ranking comes down to two factors: him being a great support, and struggling as a shooter. Kane's enemy debuff, despite being somewhat tied to RNG, proves to be a helpful bonus in just about any mission, especially ones full of sturdy enemies. He can make some difficult missions much easier to beat, but that comes at a cost of him being a support – although Kane has a solid damage output, he has problems with handling his gun well, and lacks proper close-quarters protection. He isn't entirely incompetent, and can even be used as a sole ranged unit in some cases but on average Kane is best used in a role that properly represents his class.
|
Sniper Polina
|
Sniper Polina's main appeal lies in her potential for dealing extremely high single hit damage. Although it's often better to have consistently high DPS instead of relying on bursts, Polina's shots are capable of ramping up so high, she might be able to fulfill the same role as a high-rate-of-fire unit, or at least function as a powerful support instead. Given, this implies that she has proper equipment. It's also difficult to ignore her very slow walking speed, which is a significant issue in missions with more spread out waves. Even then, Polina's potential in PvE shouldn't be ignored.
|

Generator
|
Generator is a useful stationary support unit, helping players to progress during any mission it's used in with its ability to spawn courage packs. Thanks to its extremely high health, it can be used as a strong shield for blocking enemies too. Unfortunately, these advantages are traded off by Generator's very long preparation time and very high rage cost. Chances are, it might not even see much use during a mission if it can be completed relatively fast, or if other rage abilities are higher in priority of use. In general, Generator's upsides only truly get to shine after entering the end-game, since missions start taking much longer to complete, and require much more resource to finish, which Generator is, thankfully, able to provide.
|

Cashier
|
Thanks to having notably high melee damage, Cashier excels as a burst unit – a specialization which becomes even stronger with his special ability that sets his crit. damage to 300%. He also benefits from good base health, becoming able to tank Charged Zombies faster than any other fighter does. Unfortunately, players realistically can't see these advantages in practice as Cashier only starts to truly shine when he is maxed out. He is rarely useful before reaching the last two stages because of his very slow attack speed, which doesn't allows him to properly handle multiple threats at a time. Another great issue of his is that he has no perks, meaning all he has to offer is high damage, which is not enough against huge, fast moving swarms of zombies that are so common throughout the game. He can demonstrate a truly impressive performance in certain end-game missions, but those are basically the only places where he is allowed to shine.
|

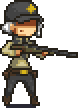
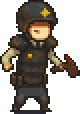
Sheriff Charlotte
|
Since Charlotte is available only late into the game her overall usefulness is severely crippled as by the time of unlocking her the player will have access to more versatile units. Despite staying in that unpleasant spot between being a solid unit and a win-more on average, she still proves to be a powerful support, all thanks to her having very high damage and near-perfect accuracy, which actually come in handy during some end-game stages.
|

Empty Barrel
|
Empty Barrel is a fairly versatile stationary unit that can be used for both offense and defense. While its health is pretty low, it still works well as a temporary obstacle. Its drop damage can easily destroy weak enemies or just deal a considerable amount of damage to tankier threats. While Red Barrel certainly outshines it because of its higher health and damage output, Empty Barrel's lesser price makes it easier to use during missions where rage meter builds up rather slowly. Admittedly, it only works during early-to-mid game, but it performs well enough to be kept in your deck up until the end of stage 5.
|
Farmer
|
Farmer's low courage cost for a ranged unit, fast preparation time, and high crowd control make him a decent choice for a big portion of the game's missions. Sadly, his long reload time and slow movement speed prevent him from being able to properly handle certain types of waves, while also not allowing him to react to extreme situations. It doesn't help that his low health curbs his effectiveness in end-game stages. Although, in case you decide to unlock his special ability, he can continue being useful at least in a role of damage support, as the double-shot ability provides a massive increase to his burst damaging potential.
|

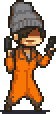
Jailer
|
Jailer is a solid unit thanks to his very low courage cost and useful stun perk, being able to deal with some enemies without much support. Even though he is impressive in theory, in practice he can't deal with large hordes of enemies, and his medium preparation time does not allow him to be the most ideal spam melee unit since he can't stay alive for too long in case his perk lets him down. It's possible to achieve great results with Jailer, but most of the time it's better to treat him as a supportive unit rather than the main fighter of the deck.
|
Grenadier
|
Grenadier is praised for his simple yet powerful ability to throw a high damage grenade since it's very efficient for clearing out large swarms of weaker zombies that make up the majority of enemies in most early missions. Grenadier is also capable of standing up for himself thanks to his good melee damage, very high attack speed, and high base health. Still, it must be pointed out that most praise for Grenadier comes from him being a crutch for early-to-mid game. Just like the majority of other damagers, he becomes fairly inefficient starting from stage 7, and will need to be replaced with another unit. It doesn't helps that his grenade gets rendered useless against end-game threats.
|
| Unit
|
Notes
|
Maria
|
When compared to other units in her class, Maria sits right in the middle in terms of viability. Her damage output is acceptable, and the buff provided through Maria's SA can have a noticeable impact on some of her teammates. In fact, she can even be safely used as the sole ranged unit in certain mission. However, all those aspects are hampered by Maria's downsides: her courage cost is crippling her playability, the kicks she does come with an odd pause after them, and her double-targetting AI is flawed, not allowing Maria to properly prioritize targets. The range of her buff is also an issue, as it requires Maria to be quite close to her teammates, otherwise she won't boost them.
|

Berserker
|
When used outside of his team synergies, Berserker tends to be a fairly unremarkable unit, with his best application being a damage support in rushdown teams. Although nowadays rage can be used a little more generously, he might still end up competing for resources with support items in your deck. That can usually be excused, but it becomes a significant problem if he is the sole melee unit, as keeping a constant supply of meat shields is usually important. Although Berserker tends to be fine, his downsides can be difficult to ignore.
|
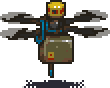
Drone
|
It's hard to give Drone a proper overview, because its performance depends entirely on the mission it's used in, or specifically the mission's wave layouts – sometimes it carries, sometimes it does nothing at all. If evaluated on average, Drone displays plainly acceptable performance, although it tends to lean a bit towards mediocrity because of its fairly restrictive preparation time and rage cost.
|
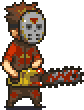
Saw
|
Although the new unit upgrade system has managed to do Saw a lot of good, it didn't really do anything to address his downsides. As he stands, Saw functions best as a damage support, capable of providing large bursts of damage against single tanky threats. With the right setup, he can help his team completely stomp all enemies and then clear the barricade just as fast. The problem is that this is all the appeal he has without team synergies taken into account. Just like in the past, Saw's gimmicky crit is the very reason he struggles against fast mooks and enemies with knockback, since it takes time to wind up and its hits are landed with a delay. Such polarizing aspects are the main reason Saw fails to be versatile and is best used as a specialist, which, sadly, harms his overall potential.
|
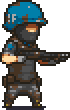
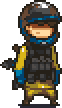
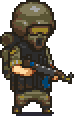
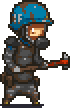
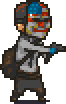
Swat
|
If Specops can be compared to Sonya in their shared upsides, Swat can be compared to Specops in their shared downsides: their base preparation time is long, the courage cost is medium-high, and they have bad accuracy and a mediocre attack pattern. It doesn't gets better with Swat also suffering from low health. And yet, despite all these glaring issues, Swat can be an alright unit if you invest into him, since he moves very fast, has a quick reload, and his bullets can cause Undead corpses to burn. However, these marginal upsides pale in comparison to his special ability, which is way too generous with the amount of damage it provides for Swat, should you opt out from upgrading damage normally in favor of giving him items with high charisma. With this ability unlocked, Swat serves as a viable single hit-oriented alternative to other shooters, which is worth running on average.
|
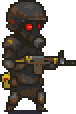
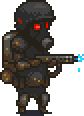
Specops
|
Theoretically, Specops can be considered a slight upgrade to Sonya, given that he shares the same stats as her while also possessing many powerful perks and resistances, allowing him to provide both great support and serve as a primary source of damage. His close combat abilities are a step up from hers as well since every melee attack causes knockback. Unfortunately, he is held back by a number of issues, with the worst one being his worse accuracy and slow firing speed, which lead to a significant decrease in DPS; deploying him closer to enemies to circumvent that will usually put his own life at greater risk. It doesn't gets better with the fact that the very ability to be deployed anywhere is very situational, and in practice shows to make Specops less playable, because it takes him a few seconds to land, making his "real" preparation time longer than advertised. Specops' only saving grace is in his health and guaranteed melee knockback, which allow to use him in a sort of supportive role for a second ranged unit. If used on his own, he proves to be lackluster.
|
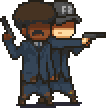
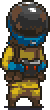
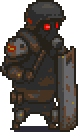
Agents
|
Being created specifically for the gimmick of "preparing" the battlefield by clearing it out of idle fragile enemies, Agents excel exclusively at that, and even then during early-to-mid game only due to later zombies being way too sturdy. While their whole design gives them a promising image of a unit comparable in strength to any of HRoF's, they don't live up to it due to inconsistent firing speed, and tendency to use melee attacks too early. It doesn't helps that there's simply better options for resolving the "clogged pathway" issue than to try to use Agents with their subpar single hit damage... However, should you unlock their special, most of these issues become resolved, since Agents basically provide themselves and their teammates with a double increase in total damage output, increasing their performance as supports on both ends of the spectrum. The problem is deciding whether the road to it is worth walking.
|
Dr. Norman
|
Doctor Norman's main appeal lies in his ability to slow down enemies while dealing true damage to them. He proves to be a useful option against tanks and some quick enemies, being able to dispatch them himself, or at least making them easier to hit by other units. Despie his great potential, Norman suffers from having very slow movement speed, dangerous on-death explosion, and an unreliable attack pattern which hinders his DPS. Depending on a mission, he might act more like a support than a proper attacker even against enemies he is theoretically best applied against.
|
Builder Abby
|
Abby's design as a single-use burst damager ends up being both her appeal, and ultimate downfall. While she is capable of destroying big hordes or a multiple massive tanks all by herself, it's hard to ignore Abby's massive cost when she is realistically gonna stay on field for just 15 seconds thanks to her very low health. It doesn't helps that she turns into a downscaled Insectoid after her death. In the end, Abby is best used in teams that can somehow improve her machine gun, or get the most out of it as is.
|

Glenn
|
Glenn's unique revival perk allows him to be used as a special spam unit since he can take on several big hits and still keep fighting some time after getting knocked down, while dishing out good damage thanks to his fast attack speed. While his potential is fairly promising, Glenn requires proper investment into his upgrades, as he feels inefficient at his lower levels, mostly because of his medium courage cost which could be used for sending out more spammable units that can do double the damage at a shorter period of time, and maybe even provide knockback. Glenn also has a problem of not being useful anywhere outside of mid-game. It gets even worse with three final stages having a large presence of zombies who completely nullify his ability, making him just a more expensive spam unit in majority of end-game missions.
|
| Unit
|
Notes
|

Pepper
|
The reason behind Pepper's ranking comes from the fact that she is only allowed to display her strengths in slower missions of end-game stages, while also needing to be maxed out since her special ability does half of the heavy lifting. There are simply no scenarios in early-to-mid stages where Pepper proves useful, as she does way too little damage for her courage cost. Said issue with damage is also the reason why she can't be raised any higher, as there's always a possibility that using a proper ranged unit in her place might do a better job for completion of most missions.
|
Carol
|
Being built primarily around Skirmish, Carol shows lackluster performance in regular missions. Since ping-ponging is rarely an option there, and her regular attack speed is merely moderate, she isn't able to perform much better than any other fighter due to lacking potential for both extreme damage, and meat-shielding. It's possible to have success by using Carol as a sort of burst damager, especially with her special unlocked, but she'll still be only this useful in the long run.
|
Dr. Miller
|
Being yet another damage support with a pistol, Dr. Miller has nothing spectacular to bring to the table. His only unique aspect, the landmine, becomes less powerful the further into the game you progress, and that is considering you keep leveling him up along the way. It doesn't helps that majority of its theoretical applications don't work in practice due to hit registration shenanigans, or end up putting Miller himself in needless danger. The main reasons Miller is still considered usable are his low courage cost and moderately fast firing speed, which, depending on a mission, might make him fare better than other pistol users.
|
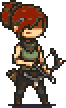
Andrea
|
When compared to her fellow snipers, Andrea fails to be nearly as useful, mainly due to very slow fire rate of her bow, and the fact that she deals noticeably less damage. The former issue is especially bad, since it makes Andrea fare worse in certain scenarios that other snipers would either be able to survive, or prevent from happening in the first place. She isn't unusable, and the bursts she provides are still appreciated, but the fact that her alternatives are able to do the same job that much better, there isn't any real reason to stick to Andrea outside of her teams.
|

Gunslinger
|
While Gunslinger isn't an unusable unit, it's hard to disagree that he isn't capable of handling a shooter's job all by himself. His slow movement speed and low health prevent him from being anything more than a secondary damage support, mostly crutching on his teammates to provide any meaningful help. Fortunately, it's not an insurmountable task for him, but that's where his potential reaches its peak.
|
Juggernaut
|
Despite many promising aspects of Juggernaut, such as extremely high health and moderate prep. time, he, like most heavyweights, suffers from being too slow: he has very high courage cost, his attack and movement speed leave wishing for the best, and his explosive slam takes a while to wind up. Speaking of Jugger's signature attack, it deserves a topic of its own. As it stands right now, it can cause serious damage and weaken swarms, but the blow's struggle with waves of fast enemies really hurts its image. By being tied to critical chance, it acts as an unreliable blessing, which either leads to overkills, or makes it come into play when it's unnecessary or too late for it. Had there been more consistency to Jugger's special, he might've been perceived as overall more useful.
|

Nitrogen
|
Nitrogen is unfortunate in that the most common mission designs actively work against it. It rarely manages to aid the player in a meaningful way because it's usually easier to use explosives or fire pools against incoming hordes than try to slow them down. Nitrogen also suffers from very long preparation time, inconvenient way of reactivating its ability, and the fact that it can affect friendly units. Its only saving grace is a few specific cases which manage to abuse Nitrogen's AoE ranged and extended stunning time, especially in relation to tanky enemies of end game stages. These cases are notable enough to warrant Nitrogen from being seen as entirely irrelevant.
|
Cap
|
Cap's ability to constantly provide his teammates with inspiration makes him a notable unit. Of course, his perk becomes especially powerful when there are several units presented on the battlefield. But unfortunately, that's exactly what makes Cap non-versatile, as he crutches on his teammates to provide large bulks of damage. Without them or if they die too quickly, he is left to mercy of enemies with his low health putting him at risk and his damage output only being about average. It doesn't helps that most of the time Cap's buff is actually not enough for certain lackluster units, meanwhile those that benefit from it greatly could do well without it either. He can prove to be a team carry, but only in very specific compositions.
|
Turbo
|
Turbo can be perceived as a lowkey contradictive sidegrade to Guard. She is much faster, costs less courage, has increased attack reach, and a uniquely astronomical knockback. But she pays for all that with atrocious DPS due to very slow charging of the crit swing. As a result, she becomes a gimmicky unit who is best used in just as specific decks that can compensate for her downsides, or in certain missions where her main gimmick can truly shine. But even then, if you actually want to see Turbo perform relatively well, you should actively avoid buffing her crit. chance, as otherwise it's more disruptive than helpful.
|
Guard
|
Acting more like Builder's sidegrade, Guard is no better than him in the main game as by the time he becomes available there are no difficult missions with ranged damage dealing enemies left in the game, at least none that Grenadier couldn't deal with. While his high speed for a tanky unit and high damage are actually useful, his slow attack speed and higher cost result in his overall performance getting hindered.
|

Builder
|
When talking about Builder, it's difficult to avoid mentioning how much he is outclassed by just about every other competent melee. No matter which aspect of his you bring up, there's bound to be a unit who can do the same thing but better. His only saving grace is that he is far from being unplayable, and it's not impossible to get okayish results with him. It's just that there's no reason to stick to Builder if you aren't using his team's synergies.
|
Light Soldier
|
Although Light Soldier is the biggest victim of late character syndrome in DA:ZW, becoming available when damagers are simply not a useful class anymore, he can still display some impressive performance, thanks to his very high health and damage, and solid attack and movement speed. Even though it's more gimmicky than anything, his potential for strength shouldn't be ignored.
|
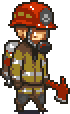
Firefighter
|
Firefighter is a fairly useful and sturdy unit, whose unique combination of poison, fire, and explosion resistances make him a sort of specialist unit for completing missions with zombies who utilize these damage types. Even though he has solid stats, he isn't all that great during missions with other regular enemies and just behaves like any other basic melee unit, and quite a mediocre one because of his slow attack speed and lack of knockback. There's really no reason to use him if he has nothing to counter.
|
| Unit
|
Notes
|
Austin
|
The reason for Austin's low ranking comes from a single downside: his extreme rage cost. Without resorting to Psychos' 2/2 synergy, he always ends up joining the fight way too late, effectively being a winmore. He might have swift preparation time, and a solid attack pattern along with fast firing speed, but all that means nothing when there's a good chance he will only come on field after you've already built a strong offense. It doesn't help that he lacks defensive abilities, making Austin difficult to use in certain portions of the game, as you constantly risk pouring all your hard-earned rage down the drain, courtesy of his low health.
|
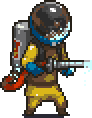
Flamethrower
|
Nowadays, Flamethrower's main issue lies in his inadequate stats – they are simply too low to bring him to his full potential. No matter how much you invest into him, an average shooter will be able to dish out much more damage, while not becoming irrelevant if a mission has fire resistant enemies in it. Not to mention his abysmal health, which only really matters during end-game but is an issue nonetheless. Flamer's only saving grace is that he is still one of the better options to take out specialised enemies like Twins, or cramped groups of tanks.
|

Molotov
|
When judging Molotov, it's hard to ignore the elephant in a room in a form of Red Barrel which outclasses the cocktail in just about everything. However, even without any comparisons, Molotov's performance leaves wishing for the best. It's unable to deal much damage to enemies since its fire pool lasts for a fixed, short period, its preparation time is unjustly long, and the rage cost is too high, considering the little impact Molotov makes. Without resorting to Patriots, there's not much reason to use Molotov even in scenarios where rage is plentiful, as it just can't do much. The only thing that it excels at is efficient corpse burning, as its AoE circle allows to make more precise shots – an element that RB sorely lacks. It's also a bit of a crutch for players who struggle with timing RB blasts against hordes of fast enemies, but getting the hang of that trick is just another part of the game's learning process, which also manifests through Grenadier's signature throw – another thing that can outclass Molotov.
|

Chopper
|
In the game's modern state, using Chopper feels a bit similar to using an average Damager. He can use his tankiness to prevent similarly massive enemies from advancing further, while being able to put his guaranteed knockback to good use by keeping some swifter enemies in check. The problem is that there's only so many missions in the game where all of these upsides are actually relevant, with the rest of it being actively hostile against Chopper's design as a slow glacier. You can have fun with him, but only so often, and even then he gets outclassed by units who simply cost less courage, or are swifter than him in one way or another.
|
Soldier
|
Soldier's situation is effectively the same as Chopper's. Regardless, he still tends to be a worse option than the hulking canadian, due to having higher courage cost and his knockback being tied to criticals.
|
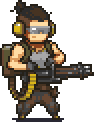
Lionheart
|
Lionheart is one of those heavyweights who is centered around his offensive capabilities, rather than fulfilling a job of a tank. This would've been tolerable had Lion been good at his intended role. He has guaranteed knockback, and a relatively fast attack speed for a heavy, but his upsides end there. His key gimmick, the gas spill, deals miserable damage that doesn't scales with his level, and only creates an obstacle for Lion's teammates. Its only application is to burn corpses but it's far from an efficient way of doing that. His SA isn't much better, as it's heavily restricted by being tied to the aforementioned gas spill. It doesn't help that it's virtually temporary, and is not applicable against majority of end-game threats. Additionally, Lion's lack of extended reach and knockback resistance highlight his problem of having as much health as an average damager. All in all, there's not a lot to appreciate about Lionheart, as the only meaningful thing he can offer is knockback.
|
| Unit
|
Notes
|

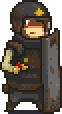
Welder
|
Being the only unit with direct barricade targeting and the ability to repair the bus and other objects, Welder might appear as a useful support with great potential. While that's technically true, he has too many disadvantages that seriously hinder it: extremely low base health, insanely long base preparation time of a full minute and a half, and the highest rage cost in the entire game are the main reasons he is just not worthy of being used outside of team synergies.
|
Medic
|
Medic's failure lies in many serious problems that are all closely related to each other. Having one of the worst damage outputs among all ranged units in the game and no offensive survivability skills, she heavy relies on her teammates for protection. However, she can't even aid them well with her medkit, as Medic's AI is very quirky and realistically only ever drops it when she finds a single damaged unit before entering a hot spot, and basically never does it again as she can't interrupt her shooting. To make matters worse, she has a very short attack range which unitentionally makes her ignore her teammates. As a result, this leads to Medic not being able to protect either other units, or herself in any way. Suffice to say, she does worse than not enough for her extreme courage cost.
|
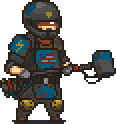
Willy
|
Willy's shield, stun gun, and his ability to ignore all resistances and knock enemies back make him look like a solid unit for dealing with tanky and/or bullet resistant enemies. While Willy is promising, he is held back by lots of problems: very short attack range, low damage, slow movement speed, extremely high courage cost (which also nullifies his fast preparation time), slow firing speed, and the fact that in practice electricity is no better than melee damage – all hinder his potential to the ground. In addition, Willy tends to begin using his shield bash way too early, often resulting in his death that otherwise could've been easily avoided. There are practically no missions in the game where he proves consistently useful.
|
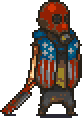
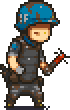
Red Hood
|
Red Hood's failure lies in his confusing design, which comes off as an attempt at making a slightly better Chopper that failed to realise what made the woodcutter work at the end of the day. By lacking any sort of perks that could help him tank damage, Red Hood ends up being a strictly worse alternative to his contemporaries. He might have slightly faster preparation time but that doesn't mean much if he folds to his enemies quicker too.
|
Queen
|
Queen can be viewed as Grenadier with a more potent grenade ability and degraded stats. Her grenade launcher can fire many more grenades and her special ability allows her to create fire pools with them, but Queen's relatively low stats for a melee unit with slow attack speed make her inferior when it comes to close combat. It only gets worse with her very high rage cost. Because of it, Queen's ability shows to be a winmore in practice, since by the time you get to play her, majority of enemies are already dealt with. There's also a problem of realistically never wanting to use Queen over other expensive rage abilities, like Generator, and her dying way too fast for such high price. In the end, the sole reason to use Queen is in case player wants to mess around with her grenades in some missions. There's really no reason to risk using her for completion, even with team powers taken into account.
|