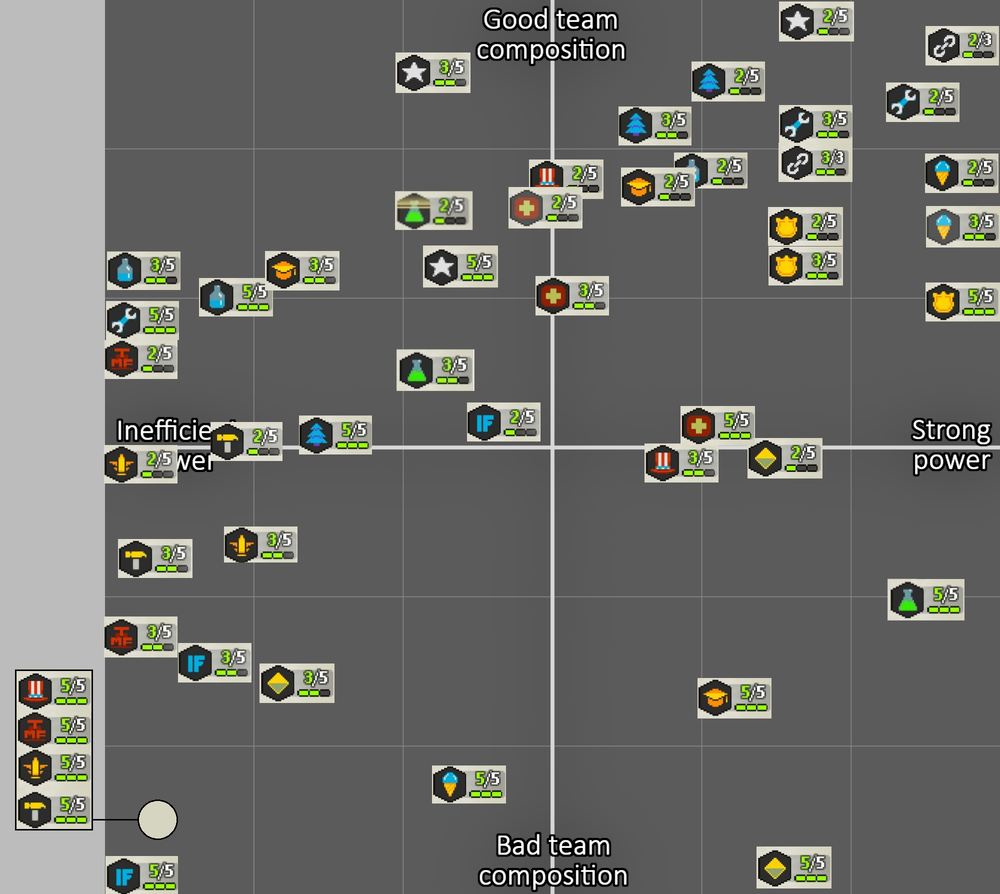
This page provides a ranking of all currently existing team powers. It aims to objectively evaluate each synergy's performance in order to determine which teams are the best to use, and which are the worst.
These rankings are made for regular missions, and largely ignore Skirmish and events. This is because more than two thirds of existing synergies are simply unusable in PvP modes, meanwhile events usually require an unortodox approach to themselves.
The ranking is based on two main factors:
- Team composition − combination of multiple factors related to units themselves:
- How much chemistry team members have between each other;
- How well the optimal team rotation performs without the synergies;
- Power efficiency − how strong the synergy is, and how much effect on overall gameplay it has.
Combinations of these factors determine the synergy's overall efficiency:
- If a synergy falls into +/+ quadrant, it means it's a good option, if not one of the best. These team powers can be used for game progression, and are generally safe to invest into, as long as you follow the most optimal unit rotations.
- If a synergy falls into -/+ quadrant, it means it's a mediocre option. You can achieve good results with it, but you would perform just as well by simply using a deck with the exact same units.
- If a synergy falls into -/- quadrant, it means it's a bad option, if not one of the worst. These team powers don't provide any meaningful help, while also failing to compensate for their poor unit rotations.
- If a synergy falls into +/- quadrant, it means it's an option that isn't useful for anything but fooling around. Such team powers are usually very strong, but are held back by poor unit rotations that fail to bring them to maximum potential.
Ranking
| Team level
|
Commentary
|
Recommended line-ups
|
| 2/2
|
Although 5% might not sound like much, it's a surprisingly high number for a synergy that runs a very spammable unit. What makes this power especially appealing is that it allows players to quickly recover after the bus was heavily damaged by anyone. It even opens an opportunity for you to keep waiting for rangers to prepare at a start of a mission, while the first wave of enemies is already attacking the bus. However, its true appeal lies in cheesing out 3 star-completions of virtually all missions. You don't even have to keep the bus at max health all the time: simply repair it after the final horde is dead. This power's only downfall is large waves of enemies. Even though its rotation offers multiple ways of dealing with them, when more than three enemies start chewing on the bus, it's easier to restart the mission.
|
 
|
Valid for majority of missions. Abuses healing the most, plus Mechanic helps to fend off enemies that were attacking the bus while you were waiting for units to prepare.
|

|
Better option for slower missions. Also valid for most levels in general, but might require to bring another fighter along.
|
|
|
A recommended alternative to the above line-up in case you want to use specifically Rodriguez as the second fighter.
|
| 3/3
|
While creating free Turrets is undeniably powerful, there're problems with this power that hinder its potential. The most crippling of them is the fact that 4 out of 6 units in the team are suicidal – neither of two fighters, nor Welder and Abby, realistically speaking, are expected to stay on field for long. Because of this, you are either forced to run Policeman and a Medkit, or pigeonhole yourself into a playstyle that involves sending out Welder right after two cheap Mechanics. Another problem is that 25% is realistically not that great of a chance, and actively spamming Hillbillies is a gamble on your resources. The position where Turrets land also doesn't helps the case – since they are spawned near the bus they only serve the defensive role, which might become irrelevant by the time Welder is ready or you have enough courage. To get the most out of this power you have to treat it as just a nice bonus instead of actively going for Sentry spawning. This way you can passively create an acceptable enough defense that might be more than enough to deal with an occassional zombie slipping past your units. Otherwise, your team ends up suffering and resorts to crutching on the 2/2 synergy to keep going.
|
 ( ( / /  ) )
|
Generally recommended team, which is strong even without the 3/3 power. Medkit is recommended to keep Diaz alive. Welder can be brought along as a 4th Mechanic in case you care about Turrets' health or really want to use his free Turret.
|
( /  / /  ) )
|
A line-up that tries to get use out of Welder's special condition. He must be sent out only after Hillbilly, with Policeman already on field. Medkit is good for keeping both Diaz and Hillbilly on their feet. Generator is used for building up courage to spam Rednecks, and Turret is good in case you want to abuse Welder's repair. Keep in mind that both Gen. and Sentry will compete with him for the rage pool.
|
| 5/5
|
Although Turret being able to fire twice as many times sounds strong in theory, in practice it's a negligible upside; not because it's useless, but because it's so closely tied to Mechanics as a whole. Likely created with 3/3 power in mind, it fails to notice that these backline Turrets will rarely fire in the first place, and so don't care about extended health much. Meanwhile, trying to use a freely placeable Sentry with the 5/5 team is a worse option than Generator or Red Barrel, which actually aid these units' gameplan well. In the end, you might come out victorious by using the 5/5 build, but its synergy won't be the reason behind its successs. If anything, Abby will be doing more damage than those turrets can dream of, should you decide to use her in the deck.
|
|
Generator provides best support for this team, as it helps to get resources for fighters, and ensures that you have enough points for backup calls of Polina and Diaz. Competition with Welder shouldn't be a problem. It's possible to substitute Polina with Abby, but more often than not Sniper's backline support proves more useful than the strongwoman's bursts.
|
| Team level
|
Commentary
|
Recommended line-ups
|
| 2/2
|
10% might've been a justified value for this synergy, had it not for one problem: builders can't be spammed. Operator might cost only 15 courage, but he takes 20 seconds to prepare at base, meanwhile Builder prepares in 13 s., but costs 25 points. All other units have even higher prices and prep. time, and since missions only last for 3 and a half minutes, 1 in 10 ends up being very low odds. Because of this, the power rarely ever comes into play. Treating it as a "nice bonus" is difficult either, as only so many builders can be considered versatile. It's often not worth bothering.
|
  
|
The most consistent 2/2 setup, which only proves viable for slow-paced missions. It treats the power strictly as a bonus, which might occasionally make your life easier each time you send out Foreman, or speed up the barricade's destruction while keeping the flow of Operators going. Sonya's position can be occupied by any other viable shooter.
|
| 3/3
|
Because this power can only activate once, it proves to be a largely mediocre upside that's not worth the hurdle of having to use three builders in the same deck. However, since units spawned for free can interact with both 2/2 and 3/3 synergies, every now and then they end up activating together and turning the tides of battle into winning direction. As much as it's unreliable, this occasional blessing prevents the team from being strictly a liability.
|

|
This deck is essentially a variation of the 2/2 build. Red Barrel and Turret are the best contenders for the 6th slot.
|
| 5/5
|
This power suffers from being needlessly niche, while requiring to fill your deck with multiple units that are unable to sustain themselves. If swift barricade destruction is genuinely important to you, then you'll have higher success unlocking Builder's or Saw's special. Otherwise, you are forced to heavily rely on Abby, Foreman, and Operator to keep the battlefield clear long enough. The only way this team can achieve success in regular missions is if all units in the deck have a significant level of cost reduction, but even that proves to be not enough in some cases.
|
   ( / ) ( / )
|
Sonya and Turret are the only options for the 6th slot that have enough versatility and offensive power to properly support the team. Red Barrel can also be used successfully, but not as often. Light Soldier doesn't have anything to offer for the deck, and Builder isn't worth spending scarce resources on. In comparison, Operator is able to cause massive impact through burst damage and knockback, and Bulldozer is a sufficient tank.
|
| Team level
|
Commentary
|
Recommended line-ups
|
| 2/2
|
It's possible to get most out of extended Medkit duration, but not in a way most players think. The extra pulses you get are best treated as an extra layer of protection for advancing units, what might force you to change the way you usually deploy the kit. Extended duration can also prove useful for keeping ranged units safe if a mission has Insectoids that spawn often. Outside of these applications, this power is a negligible upside.
|
|
An acceptable team optimised for late-game. Mostly uses the power with "extra layer" approach.
|
| 3/3
|
The reason 3/3 IFs aren't put in high regard is because of their team formation – it's barely usable outside of slower missions, and most units need to have their specials unlocked. The power itself is acceptable as an exchange of player control for a 3rd ranged unit, but it can still be tricky to activate and RNG might screw you over. Not to mention the cooldown, which gets in the way of an on-demand activation. Overall, if you'll see success with it, it will be properly geared up units to thank for this, not the kits.
|

|
A generally efficient setup that tries to make accent on use of the 2/2 power instead of relying on pseudo-blessings.
|
 
|
A deck that trades Red Barrel for Pepper's utility, while still allowing a way to use the 2/2 power, even if it's largely reliant on luck.
|
| 5/5
|
This synergy is a great example of an interesting power being completely ruined by a bad team. Having only one free slot, 5/5 IFs end up without proper support, as a result feeling more fragile than usual, and being very difficult to play. It has the same problems as 3/3 rotation, and raises them further by lacking access to cheap knockback and ranged units with good CQC (other than Pepp, who has low DPS). Whatever you will fill the 6th slot with, it'll only compensate for one of this team's problems. As for the power itself, it's interesting in that it turns Medkit into an AoE true-damage dealer. It makes this item an even better support for ranged units in missions with Insectoids. Meanwhile, when combined with Medic's special and the 3/3 IF power, it can be used to deal with Energy Spheres by covering the entire battlefield with repellent. The only problem with that is RNG – if a Medkit lands near an Egg, things can get disasterous. And again, considering which units are needed for this synergy, it'll be challenging for you to use it for missions completion. All in all, for as awesome this power sounds in theory, in practice it proves to be one of the worst.
|
–
|
Due to a number of issues related to existing bugs, there's currently no way to make this team playable.
|
| Team level
|
Commentary
|
Recommended line-ups
|
| 2/2
|
Because incomplete damage resistance doesn't allow units to actually walk through fire pools, this power is effectively useless, as it lacks the single application that would make it generally applicable, without a need to take the team's members into account. It still prevents Nancy's discharge from being too devastating, and makes Lionheart's gas spills feel like mosquito bites for his teammates, but it no longer allows you to use everything else fire-related recklessly, which was another major appeal of this synergy's previous version.
|
( / /  ) ) 
|
The most reliable deck with 2/2 Emergency in context of end-game. Soldier is most useful in missions with enemy tanks. Nancy is much more versatile and makes Medkits redundant.
|
| 3/3
|
This power sits at a weird spot in that it's very strong in theory, but in practice is held back by difficulty of its application. Trying to rely on Medic as the power activator often proves futile because of her quirky AI, and the fact that she's a pretty bad unit overall. It's not impossible for her to be a crucial team carry, but that requires some significant investments in both her and Paramedic Nancy. Meanwhile, Medkit itself is not a great option either: the most optimal 3/3 rotations would rather use a different support item, like Generator, meanwhile Medkit's lengthy preparation time prevents the buff from being used frequently enough. In most cases, it will be used three times at most. Regardless of that, a 50% increase to damage is still nothing to scoff at, and the few scenarios you'll be able to use it in can end up turning the tides of the mission, even if they are as miniscule as a faster destruction of the barricade. The main problem is deciding whether it'd be better for you to just use another strategy.
|
 ( / ) ( / )
|
The most optimal 3/3 rotation which is focused on a rushdown approach. Medkit can be used with it relatively safely, although Generator provides a better support to its intended strategy.
|

|
A simple swap of Firefighter for Medic ends up significantly changing the deck's playstyle, making it oriented more towards slower paced missions. The "key" unit is mostly used in tandem with Nancy, who is supposed to keep Medic on her feet. This co-operation leads to the power rarely ever not being active, as long as it's possible to continue spamming Climbers. The two work together especially well if Medic's SA is unlocked, which actually makes the deck about as strong as the rushdown one.
|
| 5/5
|
Sometimes, a simple increase of HP is all it takes to greatly increase the strength of a team, given that it's actually able to make any use out of it. And considering that 4 out of 6 Emergency units are melees, and the other two are supports who actively participate in frontline combat, it's safe to say that they do, in fact, benefit from their 5/5 power. But ironically, the aforementioned unit rotation is the very thing that holds this power back, as it's just incredibly awkward, and its members have little chemistry with each other. Had it not for Nancy and Climber, it would most likely fall into an unplayable category.
|
|
Since this team lacks proper ranged units, Sonya ends up providing the best support for it. Most other ranged units can do the job too, but they lack the same level of versatility as her. Lionheart is strictly worse than Bosco due to lacking in typical heavyweight qualities.
|
| Team level
|
Commentary
|
Recommended line-ups
|
| 2/2
|
Explosion immunity might sound like another overly-specific upside, and that's not far from truth. However, unlike plain fire protection, it allows TMFs to safely fight Rebels and Putrids – quite significant threats for stages they appear in. This especially shows with Rogue who becomes outright unstoppable when it comes to fighting them. But it's still important to highlight that this synergy is nothing more than a silver bullet, and an unreliable one at that. Playing with it outside of missions with explosive enemies is not the best idea, even considering that TMFs are alright when used in small numbers.
|
 ( ( / /  ) )
|
Rogue is essential as he is the only easy-to-play TMF member, not to mention his gargantuan damage. The choice between Swat and Ranger for the second slot depends on whether you want to fill the third one with another shooter or another shotgunner.
|
| 3/3
|
Because this power only activates once, you just end up with a more crippled deck than in 2/2 tier. There's no meaningful application for this.
|
|
Since this power is relatively pointless, simply using the best units TMF have is the best way to go. It's worth mentioning that Flamethrower can be brought along as the fourth member, but it's a strategy that only matters in a few gimmicky missions.
|
| 5/5
|
TMF units are infamous for being a chore to play: they require a lot of resources and support but barely compensate for that, being all fragile and unreliable. The former issue is one of the reasons this synergy fails to be of any practical use – with how rarely most of TMF can be sent out, the 50% chance of price reduction seldom comes into play. Rogue can't help the case either, as he has medium preparation time, meaning you have to either sacrifice his agility, or spend a lot of time on acquiring perfect items for him. The only situation in which this team is able to show a decent performance is if cost reduction consistently falls on the same unit (preferably Rogue), but this is a very tall requirement considering the limit on how many times the bonus can trigger.
|
 ( ( / /  ) )
|
This deck largely relies on luck. Red barrel is the closest thing to consistent support it can have. The choice betweeen Cap and Flamethrower depends on the same circumstances as described in 3/3 commentary.
|
| Team level
|
Commentary
|
Recommended line-ups
|
| 2/2
|
The inefficiency of this synergy is rather blatant, but to put it into perspective – 10% of max health is a very unrealistic requirement. It implies that each unique militia has to fight a specific zombie who has just the right amount of damage in order to activate the conditions. And then there's a 30% chance of the power actually triggering, which ends up feeling more like 1% of activating in general. At best, this team power is an unexpected but not an exciting blessing. It's worth mentioning that Lucky Guy allows militia to properly capitalize on the 2/2 power, but since it isn't a widely applicable set, the synergy is still left without proper support. Glenn is the only one who can easily take adavantage of it.
|
( / /  ) )  ( / ( /  ) )
|
The safest line up, that makes accent on use of high-rate-of-fire units instead of the synergy itself. Play it as you would normally play a ranged damage-oriented deck. Specops is the only essential militia, and Carol and Glenn are mostly interchangable, depending on whether you value damage or meat-shielding more.
|
| 3/3
|
This synergy suffers from the same problem as its 2/2 predecessor – it's fairly unlikely that it'll ever trigger. 20% activation chance is low on its own, considering the requirement of a military dying, but having to keep 3 unique units on field makes it even worse as it's difficult to keep this condition active for a long time. In most cases, players become forced to run Polina alongside Specops if they want to have a chance of spawning at least one reinforcement during a mission. It might be a better idea to just ignore this power entirely and not try to play around it.
|

|
One of the better 3/3 line-ups. Just like 2/2, it makes accent on ranged damage, but has the potential to be even more devastating if Polina is given a powerful set. Glenn is the only viable option for trying to activate the synergy.
|
| 5/5
|
The synergy's effect can only be used to "counter" Charged Zombies, allowing someone like Glenn to close the gap between them. That is, if there's no other zombies in the way, which is only valid for ~6 missions in the game. It also has a usage in form of preventing Insectoids from instantly jumping onto your ranged units, but in most missions this strategy is easily disrupted by pre-existing enemies. Overall, this power is a non-upside that forces you to run a team of units who don't synergize too well, so it's best not to bother.
|

|
This team almost entirely crutches on a properly geared-up Sniper, since she will be doing most of the damage. It's better to not play Grenadier at all, and not to rely on the 3/3 synergy, instead trying to stack up as many Polinas and Specopses as possible, only occasionally using Carol or Glenn as meatshields. Bombardier is not listed due to still being a strictly worse option than Grenadier.
|
| Team level
|
Commentary
|
Recommended line-ups
|
| 2/2
|
Rage is a pretty powerful resource, and when you obtain easy access to it things surely get nutty. This is the main reason why this power is praised so much - giving players much more freedom with their rage usage, whilst enabling spam of Psychos themselves, it allows you to beat most missions with barely any effort. 25% spawn chance is also surprisingly high, since Psychos tend to have natural crit chance values, with Saw shining the most in that department. You can even do some smart plays with Bill's LMG, since rage packs stay on the ground for quite a while. The only thing holding this power back is the fact that Saw and Berserker, the main crit powerhouses, cost 13 rage to begin with. You are forced to run at least one courage-evaluated fighter alongside them if you want to set off the circus in the first place, or completely overbuff your ranged unit of choice so they will handle all the preparations themselves.
|
 
|
The usual go-to option, which also enables the most spam. Policeman and Ranger are recommended for use alongside this trio, since they have high default valor. Fighters like Marine are important to bring along if the circus duo lacks any cost reduction items. Turret and Medkit are also very powerful supports, and are easy to abuse. Generator is usually not recommended, as you won't need as many courage.
|
  
|
A "budget" option that's focused on improving Austin's performance as a typical shooter. Redneck's spot can be occupied by just about any 15-cost fighter. Chopper is mainly used to kickstart the rage creation, which should then be handled by Austin, as long as he has a crit. build on him. The remaining slots can be occupied by any support items you deem fit for the mission.
|
| 3/3
|
This power doesn't goes too far from its 2/2 predecessors in terms of performance. The only difference is that you trade the more consistent support of a second non-psycho unit for the double increase in fire power. Even then, it still forces you, on average, to send out all three psychos at once, or be very smart about how you use your heavyweights. If you do things right, though, this team is capable of steamrolling end-game missions just as easily as its cheaper alternative.
|
( / ) ( / )
|
One of the better 3/3 line-ups. Chopper's self-heal can prove to be useful for keeping 3/3 requirement active in some missions, meanwhile Austin is a better option in case you bring someone like Sonya or Carlos along. RB is better than Medkit in missions with Charged Zombies. At least one other unit must be evaluated in courage too, and can be both a ranger, and a fighter. There are many valid options and they ultimately depend on the mission you are playing.
|
| 5/5
|
With 2/2 already providing a big supply of rage, 5/5 ends up being rather redundant. It's only application is in a few specific missions, where early waves of enemies might provide good chances of droping a 20-pack, allowing to enable Saw/Berserker spam faster. But all in all, despite having the upsides of its previous tiers, this team fails to be even half way as efficient due to its lack of access to support items.
|
( / /  ) )
|
The choice between Red Hood and Queen depends on how much spammy waves a mission has. The 6th slot should be occupied by another courage evaluated unit, with the selection of valid options being large once again.
|
| Team level
|
Commentary
|
Recommended line-ups
|
| 2/2
|
This is yet another power that is best treated as a nice bonus, mostly thanks to having a good rotation of units in its team. While it is possible to enable some degeneracy with its potential for spam, the 5% chance of that happening is simply not reliable enough. Although, it is realistic to achieve great results by using a build-around deck. You just need to take into account that it won't be flawless.
|

|
The go-to option that works in just about every mission, as long as the rest of the deck is built appropriately.
|

|
A foundation of the spam-oritented build. Medkits are most commonly used to aid Rednecks under attack, so they have better chances of spawning packs.
|

|
A build focused on ranged damage. Mostly orinted towards missions with Insectoids.
|
| 3/3
|
This power is essentially an extension of the 2/2, except it's even more unreliable with the help it offers. It's almost entirely oriented towards zerg rush gameplay, as 3 out of 5 rednecks are melee units. But the real problem is that the promised healing can land on units with full health too. As a result, this power often ends up an empty promise. It sees better use as a part of 5/5 line-up – see commentary below for more.
|
|
Simply a powerful deck that just so happens to have three rednecks in it.
|
| 5/5
|
As it turns out, having more units from the same team raises your chances of winning a dice roll. Rednecks synergize surprisingly well together, and thanks to this the 5/5 line-up is capable of doing the spam strat even more efficiently than the 2/2 build. However, it mostly happens thanks to Nancy's invaluable support, since she maximizes resource efficiency, keeps the flow of Rednecks going, and compensates for Carlos', Chopper's, and Farmer's preparation times. Without her this line-up would've been much weaker. It doesn't helps that there's no info on the chances of an on-death courage pack spawn, and that this team's unit rotation is as good as useless outside of Redneck synergy.
|
|
Red Barrel provides the best general support for this team. Medkits are negligible here, since their job is occupied by Nancy, and Redneck (the unit) is cannon fodder anyway.
|
| Team level
|
Commentary
|
Recommended line-ups
|
| 2/2
|
Most of this power's utility comes down to ensuring that units with dangerous on-death transformations become non-threats. This is indeed useful for the likes of Policeman, and Saw, and fortunately for these units, the most flexible College members are strong enough to synergize with them well. The problem is that this is all there is to this power, and it doesn't help College members themselves much, most of whom lack flashy attributes, and are concerningly frail, with Sonya being the only overall exception. At the end of the day, this power's usefulness greatly depends on what units you are actually planning to make accent on.
|
 
|
The most effective choice of units for the 2/2 power. It's highly advised to run at least one more ranged unit alongside them.
|
| 3/3
|
The 3/3 College rotation is one of the many cases when a team is relatively solid, but the power is just not worth the hassle of pursuing. Charisma is just too useless of a stat on average, with College in particular failing to apply it to anything other than interaction with Sonya's special. But even then, whatever effect that interaction will have, you might not even notice it.
|

|
A simply usable deck with three college members. Despite having very high Charisma, Coach isn't mentioned due to his bad cost-to-health ratio. Compared to him, Dale is simply quicker and cheaper to send out. Diaz' spot can be occupied by any other ranged unit with 300+ charisma; he just happens to be the best option out of all.
|
| 5/5
|
Creating a whole factory out of College members would prove to be extremely powerful, had it not for a weird issue this team currently suffers from. As it turns out, Sonya and Waterboy are a bit too good at their job, with Bully and Dale also being great damage supports to them, and they all make a quick work out of any mission if you play your cards right. This comes at a cost of the 5/5 power rarely ever activating, and as a result not making any difference. And when you do try to deliberately activate the power, and play missions very slowly, it ends up being either an overkill, or disruptive in some way. All in all, it's another case of a power being strictly a nice bonus due to its selection of units already being good at their job.
|
 
|
The most reliable selection of units for the 5/5 team. The 6th slot can be filled with whatever rage item you deem necessary for a mission, with Medkit, Red Barrel, and Generator being the safest options as usual.
|
| Team level
|
Commentary
|
Recommended line-ups
|
| 2/2
|
This synergy proves to be helpful for dealing extra burst damage if you choose the correct units for the job. Lester can provide insane bulks of damage should his special be unlocked, meanwhile it becomes trivial for Glenn and Worthy to mow through hordes of enemies. Sonya can also benefit from it, as there's a chance this power will improve her likelihood of using the roundhouse kick. In general, there are no downsides to using this power, as long as you properly gear up your units of choice.
|
 
|
This rotation proves to be the most versatile, working in just about any kind of mission while also leaving room open for a wide variety of other units to tag along. Using Generator is recommended.
|

|
This team partially ignores the synergy, and instead aims to achieve very high ranged damage output. Given, it'll be a waste of time if neither Sonya, nor Lester have any critical damage boosts.
|
| 3/3
|
While Northerners' synergies are overall pretty useful, it's hard to ignore that their selection of units isn't exactly able to take full advantage of them. There's only a few units in the roster who can properly focus on critical attacks, meanwhile the rest either have no benefit to gain from such builds, or even outright suffer from them, mostly due to slow attack speed or lack of health. Because of this, the best approach to 3/3 Northerners is to treat them as an extension of the 2/2 builds. In some cases, this will prove very useful. In others it just won't be making any difference.
|
|
The strongest possible 3/3 rotation, which accentuates ranged damage even more by making it so Lester and Sonya are guaranteed to provide a huge burst for their first attack. Worthy is also great for activating the synergy on demand.
|
( / /  ) )
|
A fully budget alternative to the above build that's riskier to use, but can still show an acceptable performance. The choice between Chopper and Nurse Hirsch depends on whether offense or defense matters more in a mission.
|
| 5/5
|
5/5 Northerners is yet another team which only proves to be playable because of its previous tiers doing all the job of carrying the roster. The power itself is mostly negiligble, since whatever effect it might have isn't even noticeable. In most cases, Lester and Sonya are the only consistently effective members, with usefulness of each melee depending on whether they are maxed out or not, and also differing from mission to mission. It's actually common for only one of them to even be playable, meanwhile the other two don't act as anything more than courage sinks. It's definitely not the best team there is, but it's also far from being useless thanks to a few very powerful members.
|

|
The most reliable selection of units currently available. Worthy's general utility proves crucial, despite him having no way to interact with the synergy. In case the power still matters to you, Turbo can work as a less effective substitute. It's also possible to use her as a replacement of Glenn instead, creating a semi-budget version of the deck.
|
| Team level
|
Commentary
|
Recommended line-ups
|
| 2/2
|
A very straightforward synergy, it can be treated as a way to bring Marine to a much greater power level while sacrificing basically nothing. And while the power itself doesn't does anything to help your team directly, the sheer strength of unpausing Rodriguez fully compensates for that.
|

|
A fully budget version which is efficient enough thanks to Sonya being a good unit on average. It's recommended to pair her with Carlos for massive damage output.
|
| 3/3
|
Unfortunately for this team, raising agility to a hundred doesn't does much to improve performance of ranged units, who make up 60% of Marines. It's a very negligible upside, and if you'll be performing well with this deck it won't be the synergy to thank for that.
|

|
Simply efficient rotation that consists of units who have the most chemistry between each other. The remaining slots can be occupied with just about anyone and anything that isn't useless and won't interfere with the team's playstyle, including Nancy tagging along as the 4th Marine.
|
| 5/5
|
This power essentially acts as a combination of all previous tiers, not restricted by any condition. Its only notable thing is that it also boosts agility of Nancy, who is otherwise not affected by previous powers. For the most part, it crutches on good items to be efficient, although it's hard to deny that it's possible to achieve devastating results with it, thanks to high single hit damage of Polina, and Nancy's immense support. All in all, it's a fine team, but somewhat unnecessary.
|
/
|
Red Barrel provides good support for the team, thanks to its offensive and defensive versatility. Generator acts as an alternative that accentuates unit spammability. Although, it must be said that this team works best for ranged damage stacking, not Rodriguez zerg-rushing.
|
| Team level
|
Commentary
|
Recommended line-ups
|
| 2/2
|
Despite their lackluster upside, 2/2 Patriots manage to be an okayish team thanks to having access to units who are very strong on their own. Even then, double damage output from Molotov isn't something that should be ignored – in some cases it can prove to be a powerful burst of damage, going as far as being useful against the biggest threats of stage 8.
|
  
|
The most reliable 2/2 rotation. In a way, Rodriguez is an essential unit, since he is the only one who can allow Patriots to have knockback without special abilities. Molotov is specified for obvious reasons.
|

|
Somewhat budget-friendly alternative to the above team.
|
| 3/3
|
Unfortunately for them, Patriots are yet another team that is too fragile to ever put their 3/3 power to full use. As it stands right now, it only works as an occasional boost to already applied fire debuffs, and maybe for quadrupling Molotov's output. Had it not been for that issue, this synergy would be able to provide insane damage more consistently.
|
|
The best base selection possible. Depending on a mission, Policeman, Generator, Molotov, and Medkit are all good options for the remaining slots.
|
| 5/5
|
This team is a glass cannon without the cannon part. It might've been able to prove itself useful in some scenarios had it not for the miserable damage of the 5/5 debuff – even with 3/3 synergy active, it does 12 dmg per tick max. Both Red Barrel and Molotov can achieve that for much cheaper, while also having 4 or 6 times greater damage output thanks to previous tiers. It's better to not bother.
|
|
Red Barrel is the only option that manages to provide defensive help for the team while accentuating it's previous tiers.
|
| Team level
|
Commentary
|
Recommended line-ups
|
| 2/2
|
Jailers are one of the very few teams who have strong synergies which are held back purely because of poor unit rotation. This creates a situation where they work better as tag-alongs for a different 2/2 gang which might benefit from faster item preparation no less than Jailers themselves. Still, it's entirely possible for them to be self sufficient at this tier, since being able to use the likes of Turret more often is that good. Although, such approach can limit the number of missions where this team performs nicely.
|
 
|
The most reliable rotation, which also has the best synergy with other 2/2 teams. Basically any support item can be used with this rotation, with the exception of Blue Barrel since it offers too little. Bringing someone like Policeman along is a good idea, in case you try to use Jailers as a self-sufficient team.
|
( / /  ) )
|
Budget alternatives which don't stand out with anything. Guard outshines Gunsligner in only a few specific scenarios; everywhere else he is strictly worse. It's highlgy recommended to bring at least one versatile ranged unit together with Polina.
|
| 3/3
|
This power can be shrugged off as irrelevant because of the fact that Jailers have only one close combat fighter without access to stuns, meanwhile ranged units on the team have no natural access to criticals, meaning that the power will trigger on them with an 8% chance at best. Not to mention that among those units only one of them properly benefits from crit. builds. The situation might've been radically different if the team had more versatile shooters or even shotgunners in its roster, but in its current form it's barely worth the risk.
|
( / )
|
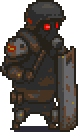
The best possible team for the synergy. Jailer's cheap price allows to activate it on demand, meanwhile Polina is likely to stay behind her team while it advances. Gunslinger is effectively the main source of ranged stuns. Guard is brought up as a budget alternative to Jailer, although his much higher courage cost makes him a strictly worse option.
|
| 5/5
|
This team accentuates the issues brought up in the discussion of 2/2 tier by forcing you to use Willy, Gunslinger, and Guard all in the same deck. It has potential for greatness, but with current Jailers rotation there's no way to bring it to such level.
|
/
|
Turret is the only item that is able to consistently support this team, as it provides them with a much needed extra layer of defence. Generator is also a viable option, and is even theoretically best, since most Jailers are rather costly, but in practice it fails to do its job quick enough. You can see success with it but you'll also have to stay on your toes the whole time.
|
| Team level
|
Commentary
|
Recommended line-ups
|
| 2/2
|
Because of how units' reloading logic works, this power ends up being either a massive boon, or completely irrelevant depending on the mission you are playing. It's possible to achieve great results with it in levels full of tanky threats or constant streams of enemies. But outside of those, primarily in missions with long periods between waves, this synergy won't help you much. The only units who can consistently benefit from it are shotgunners, since it means that most of the time they won't have to reload as often. All in all, this synergy doesn't has any real downsides to it, but you will be better off running something else at times.
|

|
If their special ability is unlocked, Agents will grant players access to Police 2/2 at the cost of just one slot. For an obvious reason, this provides the most freedom of deck formation, and as a result allows to properly take advantage of the synergy without making any cutbacks.
|

|
The classic budget option, which can prove to be very effective in certain missions if Charlotte is properly leveled up.
|
|
The most optimal rotation that doesn't rely on Agents' special. Ranger is one of the best tag-alongs for Policeman, but his slot can be occupied by practically any other viable ranged unit.
|
| 3/3
|
Depending on how you approach this synergy, it either suffers from the same problems as the 2/2 tier, or proves to be a powerful bonus that you get your hands on way too late. If you make accent on ranged damage then this power doesn't go any further than occasionally providing protection from Insectoids. If you instead focus on melee units, then it offers a solid way of supporting rushes of Riots and Glenns, even though this approach to spam is slightly unorthodox and potentially unnecessary, seeing meaningful application only in very extreme conditions. All in all, this power has its uses but it's hard to say for sure whether it's a truly valuable bonus or just an overkill that might not even come into play.
|
|
Agents' SA comes into clutch yet again, not only granting access to more options, but also allowing to send out a shielded cop immediately after spawning them. Diaz is a better choice when you want to use a fighter other than Riot. It's also acceptable to use those three units together.
|

|
The eponymous melee oriented build that tries to abuse tanky Glenns and Riots as often as possible.
|
| 5/5
|
Although this team's unit rotation is really not that great, the way the 5/5 power interacts with Police's previous tiers ends up creating devastating results in a proper environment. Ranged units being buffed by Fury is busted on its own, and when this effect can be reliably triggered mutltiple times for the cost of one unit, things quickly get massive. The only issue that holds this power back is that it realistically affects noone but rangers, with Riot and Glenn never getting any opportunities to get buffed themselves. It's a team that completely destroys slow end-game missions, but that's as far as its "proper" application goes.
|
|
Use of maxed-out Agents together with the melee-oriented 3/3 team proves to give the best results, as it provides whole two free slots, which can be filled with any support items you deem best for a specific mission.
|
| Team level
|
Commentary
|
Recommended line-ups
|
| 2/2
|
This synergy acts as a more or less solid way of boosting Drone's damage output, which can prove to be very useful at dealing with large hordes of enemies, or at least severely damaging them. The problem is that this is as far as this synergy's appplication goes, with even maxed out Drone's offensive capabilities largely falling off during end-game, all because of most enemies being way too sturdy, or levels being riddled with Eggs. Fortunately, it at least stays a strong option against the final horde, so it's not entirely irrelevant. Ultimately, this synergy's usefulness depends on how much you want to use Drone, and whether you are willing to tolerate the awkward unit selection that's required to enhance its strength.
|
|
A team that accentuates a rushdown approach. Drone is specified for obvious reasons.
|
 ( / ) ( / )
|
The most optimal ranged damage-oriented team. The choice between LS and Saw depends on whether you want to use Generator or not.
|
| 3/3
|
It's not uncommon for synergies to require some sort of working around in order to be viable. However, the case of Scientists' 3/3 is one of the more extreme examples of that, as if you put no effort into playing this deck then it becomes outright counterintuitive. Play your cards right, though, and it's suddenly able to steamroll most of end-game missions with little issue.
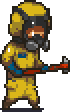
The aforementioned disadvantages of the synergy stem from the fact that Drones are able to harm humans too, with whatever explosion resistance they might have being cancelled out by Drone's double damage from the 2/2 power. This requires using most of the scientists as some sort of kamikazes, while resorting as few of them as possible to the backlines. This is an approach that can prove fruitful in some scenarios, especially if you choose the right non-scientist unit to bring along with the yellows. The main problem is that most of those scenarios are resorted to the end-game, with the synergy being largely an overkill everywhere else. It can prove to be a great option, but the sheer effort it requires putting into it might not be worth the returns.
|
( / /  ) )
|
The most effective deck currently available. The choice between Norman and Miller depends on whether you prefer passive or active play, and how often do you want to see the power trigger. Using Liquidator in place of Sanchez is not an option, as he is a massive resource hog, meanwhile Saw can be easily spammed and therefore trigger the power more often, all while preserving courage for ranged units of the deck. Freely usable Drone synergizes with this power surprisingly well, as it allows to draw enemies further away from ranged units, allowing to minimize losses once the power activates.
|
| 5/5
|
As history shows time and time again, the more damage – the better. This team capitalizes on this simple wisdom in an extreme way, allowing its members to easily rack up damage increase as high as x2.5 against enemies in the same level, given that it's full of spam. But even if a level isn't rich with it, applying extra vulnerability on enemies is still appreciated. The only thing holding this power at check is the fact that current Scientist rotation suffers from an identity crisis, having three supports, two gimmicky damagers, and two short-range stunners. Given, if you play them optimally, Sanchez, Liquidator, and Dr. Norman will have no problem getting the most out of the synergy's generous bonus, meanwhile Dr. Kane will help to increase the team's total damage output even further. But even then, it's hard to ignore that this team still requires an "outsider" to put the power to full use. The fact that none of support items actually manage to do their job for the 5/5 rotation doesn't helps its case.
|
( / ) / )
|
Sonya is the only one capable of providing the team with a much needed crutch. The choice between Dr. Pepper and Liquidator depends on whether you value protection of your ranged units over higher chanches of triggering the 3/3 power. Due to her overall inadequancy, Dr. Lilly is not worth using in this team.
|
| Team level
|
Commentary
|
Recommended line-ups
|
| 2/2
|
Thanks to melee being the primary form of enemy damage, this power ends up being an extreme boon, effectively providing all prisoners with a double increase to health. While there are situations where melee resistance is unnecessary, they are very far and few between. It also helps that the strongest prisoners are highly versatile units, which means that this power doesn't require any effort to be utilized efficiently, making it easy to abuse. As long as you don't use your prisoners outright carelessly, it's impossible to go wrong with this synergy.
|
 
|
In comparison to Sonya, Maria borders on being her straight downgrade, which is why she can't be highlighted here. Aside from that, the duo of Prisoner and Parker is entirely self-sufficient, which also makes it unnecessary to use other units, which means that the rest of the deck can be filled with support items. Generator is highlighted as the best one, but it's not necessary to use it all the time.
|
| 3/3
|
As if 2/2 wasn't an overkill in itself, this power makes prisoners border on being unstoppable by providing reusable, intuitive immunity to damage. The only thing that keeps this power in check is the fact that it's tied to a 3/3 condition. But even that isn't a big obstacle, thanks to Maria and Sonya being able to protect themselves at close quarters, making it easy to keep the condition active.
|
Any support item
|
Since there're no alternative 3/3 builds possible right now, the only available deck acts as an extension of the 2/2 build. All commentary related to it applies to the 3/3 tier too.
|
