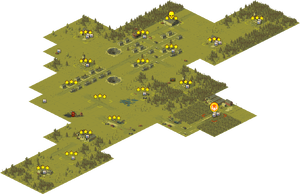
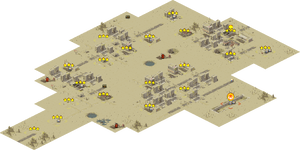
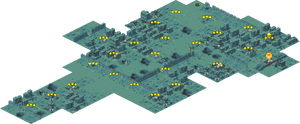
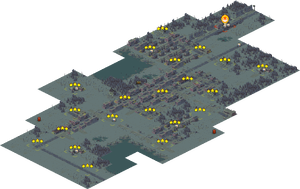
Locations (DA:ZW)
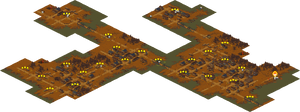
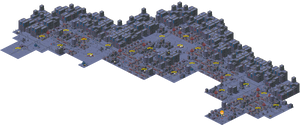
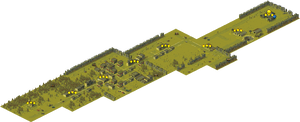
Locations, also commonly referred to as stages, are presented as a flat map of tiles. Along with missions, there are some resource caches containing loot. Loot that frequently appears on each stage are power points, upgrade items, and fuel barrels.
Missions in each location can be unlocked by either completing previous missions or using one fuel point on undiscovered tiles. When completing a mission, the player will not only get a reward for completing the mission but also get a star rating. The number of stars earned depends on the remaining durability of the bus as the player finishes a mission:
- 0-30% bus health grants a 1-star rating;
- 30-99% bus health grants a 2-star rating;
- 100% bus health grants a 3-star rating;
- Boss missions that state "The boss has been defeated!" upon completion grant a 3-star rating, unless the bus health falls under 1%.
It's essential to collect stars as it will not only unlock new stages, but also grant extra rewards via the Star Reward system, which can grant players free units, coins, blue keys, and unlock other game modes. If players complete all the levels of one location with 3-star ratings, they will receive one or two blue keys as a reward.
Some missions contain items that can be found when interacting with a vehicle in that mission. This can only be done once and it usually also spawns a zombie
Time Limit
Mission are required to be completed before an invisible timer ends its countdown. Every level lasts for 3 minutes and 30 seconds, what is equal to the length of every mission's main theme. If the player takes too long to complete some mission and the barricade hasn't been destroyed yet, the timer will become visible at 37 seconds left till the end.
When that timer reaches zero, a large wave of Witches will always appear alongside another large wave of zombies depending on the stage and mission. This will always occur on every regular and challenge mission excluding Mission 1 and Mission 142, the final boss mission where it's replaced with a unique timer towards the end of the battle instead.
For detailed information on what enemies appear during the final wave, see: Enemies.
Location 1
Has a total of 48 stars.
| Unlock Requirements | |
|---|---|
| Stage Unlock | Initially available |
| Challenge 1 | N/A |
| Challenge 2 | 39 stars |
| Challenge 3 | 45 stars |
|
Missions |
Difficulty |
First Clear Rewards | Subsequent Clear Rewards | Hidden items | |||
|---|---|---|---|---|---|---|---|
| Gold | Survival Points | Power Points | Gold | Survival Points | |||
| Mission 1 | Easy | 9 | 27 | 10 | - | ||
| Mission 2 | Easy | 9 | 27 | 10 | - | ||
| Mission 3 | Easy | 9 | 27 | 10 | - | ||
| Mission 4 | Easy | 11 | 32 | 10 | - | ||
| Mission 5 | Easy | 11 | 32 | 10 | - | ||
| Mission 6 | Easy | 13 | 32 | 10 | YES | ||
| Mission 7 | Easy | 13 | 37 | 13 | YES | ||
| Mission 8 | Easy | 13 | 37 | 13 | - | ||
| Mission 9 | Easy | 13 | 37 | 13 | - | ||
| Mission 10 | Easy | 13 | 37 | 13 | YES | ||
| Mission 11 | Easy | 15 | 43 | 13 | - | ||
| Mission 12 | Easy | 15 | 43 | 13 | - | ||
| Mission 13 | Easy | 15 | 43 | 13 | - | ||
| Challenge 1 | Easy | 30 | 43 | 26 | - | ||
| Challenge 2 | Nightmare | 30 | 43 | 26 | YES | ||
| Challenge 3 | Normal | 30 | 43 | 26 | - | ||
Location 2
Has a total of 57 stars.
| Unlock Requirements | |
|---|---|
| Stage Unlock | 30 stars |
| Challenge 1 | 90 stars |
| Challenge 2 | 97 stars |
|
Missions |
Difficulty |
First Clear Rewards | Subsequent Clear Rewards | Hidden items | |||
|---|---|---|---|---|---|---|---|
| Gold | Survival Points | Power Points | Gold | Survival Points | |||
| Mission 14 | Easy | 15 | 43 | 20 | YES | ||
| Mission 15 | Easy | 15 | 43 | 20 | - | ||
| Mission 16 | Easy | 15 | 43 | 20 | - | ||
| Mission 17 | Hard | 20 | 49 | 20 | - | ||
| Mission 18 | Easy | 20 | 49 | 20 | - | ||
| Mission 19 | Easy | 20 | 49 | 20 | - | ||
| Mission 20 | Hard | 20 | 49 | 20 | YES | ||
| Mission 21 | Hard | 20 | 49 | 20 | YES | ||
| Mission 22 | Easy | 20 | 49 | 20 | - | ||
| Mission 23 | Easy | 20 | 49 | 20 | - | ||
| Mission 24 | Easy | 24 | 57 | 20 | - | ||
| Mission 25 | Hard | 24 | 57 | 20 | - | ||
| Mission 26 | Hard | 24 | 57 | 20 | - | ||
| Mission 27 | Easy | 24 | 57 | 20 | - | ||
| Mission 28 | Easy | 24 | 57 | 20 | - | ||
| Mission 29 | Normal | 24 | 57 | 20 | - | ||
| Mission 30 | Normal | 24 | 57 | 20 | - | ||
| Challenge 1 | Normal | 48 | 57 | 39 | YES | ||
| Challenge 2 | Easy | 48 | 57 | 39 | - | ||
Location 3
Has a total of 69 stars.
| Unlock Requirements | |
|---|---|
| Stage Unlock | 60 stars |
| Challenge 1 | 160 stars |
| Challenge 2 | 168 stars |
|
Missions |
Difficulty |
First Clear Rewards | Subsequent Clear Rewards | Hidden items | |||
|---|---|---|---|---|---|---|---|
| Gold | Survival Points | Power Points | Gold | Survival Points | |||
| Mission 31 | Normal | 24 | 57 | 30 | YES | ||
| Mission 32 | Normal | 24 | 57 | 30 | YES | ||
| Mission 33 | Nightmare | 30 | 67 | 30 | - | ||
| Mission 34 | Normal | 30 | 67 | 30 | - | ||
| Mission 35 | Easy | 30 | 67 | 30 | - | ||
| Mission 36 | Normal | 30 | 67 | 30 | - | ||
| Mission 37 | Easy | 30 | 67 | 30 | - | ||
| Mission 38 | Easy | 30 | 67 | 30 | - | ||
| Mission 39 | Normal | 30 | 67 | 30 | - | ||
| Mission 40 | Normal | 30 | 67 | 30 | - | ||
| Mission 41 | Normal | 30 | 67 | 30 | - | ||
| Mission 42 | Easy | 30 | 67 | 30 | - | ||
| Mission 43 | Normal | 30 | 67 | 30 | - | ||
| Mission 44 | Normal | 30 | 67 | 30 | - | ||
| Mission 45 | Easy | 38 | 77 | 30 | - | ||
| Mission 46 | Easy | 38 | 77 | 30 | - | ||
| Mission 47 | Normal | 38 | 77 | 30 | - | ||
| Mission 48 | Normal | 38 | 77 | 30 | - | ||
| Mission 49 | Easy | 38 | 77 | 30 | - | ||
| Mission 50 | Normal | 38 | 77 | 30 | - | ||
| Mission 51 | Normal | 38 | 77 | 30 | - | ||
| Challenge 1 | Hard | 76 | 77 | 60 | - | ||
| Challenge 2 | Nightmare | 76 | 77 | 60 | - | ||
Location 4
Has a total of 63 rating stars.
| Unlock Requirements | |
|---|---|
| Stage Unlock | 110 stars |
| Challenge 1 | 220 stars |
| Challenge 2 | 225 stars |
|
Missions |
Difficulty |
First Clear Rewards | Subsequent Clear Rewards | Hidden items | |||
|---|---|---|---|---|---|---|---|
| Gold | Survival Points | Power Points | Gold | Survival Points | |||
| Mission 52 | Easy | 38 | 77 | 45 | YES | ||
| Mission 53 | Normal | 38 | 77 | 45 | - | ||
| Mission 54 | Easy | 38 | 77 | 45 | - | ||
| Mission 55 | Easy | 38 | 77 | 45 | - | ||
| Mission 56 | Hard | 38 | 77 | 45 | YES | ||
| Mission 57 | Normal | 38 | 77 | 45 | - | ||
| Mission 58 | Nightmare | 38 | 77 | 45 | - | ||
| Mission 59 | Nightmare | 38 | 77 | 45 | - | ||
| Mission 60 | Normal | 38 | 77 | 45 | - | ||
| Mission 61 | Hard | 47 | 90 | 45 | - | ||
| Mission 62 | Normal | 47 | 90 | 45 | - | ||
| Mission 63 | Easy | 47 | 90 | 45 | - | ||
| Mission 64 | Easy | 47 | 90 | 45 | YES | ||
| Mission 65 | Easy | 47 | 90 | 45 | - | ||
| Mission 66 | Easy | 47 | 90 | 45 | - | ||
| Mission 67 | Normal | 47 | 90 | 45 | YES | ||
| Mission 68 | Normal | 47 | 90 | 45 | - | ||
| Mission 69 | Easy | 47 | 90 | 45 | - | ||
| Mission 70 | Hard | 47 | 90 | 45 | - | ||
| Challenge 1 | Nightmare | 93 | 90 | 75 | |||
| Challenge 2 | Nightmare | 93 | 90 | 75 | |||
Location 5
Has a total of 69 rating stars.
| Unlock Requirements | |
|---|---|
| Stage Unlock | 150 stars |
| Challenge 1 | 290 stars |
| Challenge 2 | 297 stars |
|
Missions |
Difficulty |
First Clear Rewards | Subsequent Clear Rewards | Hidden items | |||
|---|---|---|---|---|---|---|---|
| Gold | Survival Points | Power Points | Gold | Survival Points | |||
| Mission 71 | Easy | 50 | 90 | 60 | - | ||
| Mission 72 | Normal | 50 | 90 | 60 | - | ||
| Mission 73 | Normal | 50 | 90 | 60 | - | ||
| Mission 74 | Normal | 50 | 90 | 60 | - | ||
| Mission 75 | Easy | 50 | 90 | 60 | YES | ||
| Mission 76 | Normal | 50 | 90 | 60 | - | ||
| Mission 77 | Normal | 50 | 90 | 60 | YES | ||
| Mission 78 | Normal | 50 | 90 | 60 | - | ||
| Mission 79 | Hard | 50 | 90 | 60 | - | ||
| Mission 80 | Normal | 50 | 90 | 60 | - | ||
| Mission 81 | Easy | 61 | 105 | 60 | - | ||
| Mission 82 | Easy | 61 | 105 | 60 | - | ||
| Mission 83 | Nightmare | 61 | 105 | 60 | |||
| Mission 84 | Easy | 61 | 105 | 60 | YES | ||
| Mission 85 | Easy | 61 | 105 | 60 | - | ||
| Mission 86 | Normal | 61 | 105 | 60 | - | ||
| Mission 87 | Normal | 61 | 105 | 60 | - | ||
| Mission 88 | Normal | 61 | 105 | 60 | - | ||
| Mission 89 | Easy | 61 | 105 | 60 | - | ||
| Mission 90 | Easy | 61 | 105 | 60 | YES | ||
| Mission 91 | Normal | 61 | 105 | 60 | - | ||
| Challenge 1 | Hard | 122 | 105 | 120 | - | ||
| Challenge 2 | Nightmare | 122 | 105 | 120 | |||
Location 6
Has a total of 72 rating stars.
| Unlock Requirements | |
|---|---|
| Stage Unlock | 190 stars |
| Challenge 1 | 351 stars |
| Challenge 2 | 356 stars |
|
Missions |
Difficulty |
First Clear Rewards | Subsequent Clear Rewards | Hidden items | |||
|---|---|---|---|---|---|---|---|
| Gold | Survival Points | Power Points | Gold | Survival Points | |||
| Mission 92 | Normal | 61 | 105 | 75 | - | ||
| Mission 93 | Easy | 61 | 105 | 75 | - | ||
| Mission 94 | Easy | 61 | 105 | 75 | YES | ||
| Mission 95 | Normal | 61 | 105 | 75 | YES | ||
| Mission 96 | Easy | 61 | 105 | 75 | - | ||
| Mission 97 | Nightmare | 61 | 105 | 75 | - | ||
| Mission 98 | Hard | 61 | 105 | 75 | - | ||
| Mission 99 | Easy | 61 | 105 | 75 | - | ||
| Mission 100 | Normal | 61 | 105 | 75 | YES | ||
| Mission 101 | Easy | 61 | 105 | 75 | YES | ||
| Mission 102 | Easy | 61 | 105 | 75 | YES | ||
| Mission 103 | Easy | 61 | 105 | 75 | - | ||
| Mission 104 | Easy | 61 | 105 | 75 | - | ||
| Mission 105 | Normal | 77 | 122 | 75 | - | ||
| Mission 106 | Hard | 77 | 122 | 75 | YES | ||
| Mission 107 | Easy | 77 | 122 | 75 | YES | ||
| Mission 108 | Easy | 77 | 122 | 75 | - | ||
| Mission 109 | Easy | 77 | 122 | 75 | YES | ||
| Misiion 110 | Hard | 77 | 122 | 75 | - | ||
| Mission 111 | Hard | 77 | 122 | 75 | - | ||
| Mission 112 | Easy | 77 | 122 | 75 | YES | ||
| Mission 113 | Hard | 77 | 122 | 75 | YES | ||
| Challenge 1 | Normal | 155 | 122 | 150 | - | ||
| Challenge 2 | Normal | 155 | 122 | 150 | |||
Location 7
Has a total of 63 rating stars.
| Unlock Requirements | |
|---|---|
| Stage Unlock | 230 stars |
|
Missions |
Difficulty |
First Clear Rewards | Subsequent Clear Rewards | Hidden items | |||
|---|---|---|---|---|---|---|---|
| Gold | Survival Points | Power Points | Gold | Survival Points | |||
| Mission 114 | Nightmare | 77 | 122 | 90 | - | ||
| Mission 115 | Nightmare | 77 | 122 | 90 | - | ||
| Mission 116 | Nightmare | 77 | 122 | 90 | - | ||
| Mission 117 | Hard | 77 | 122 | 90 | - | ||
| Mission 118 | Nightmare | 77 | 122 | 90 | YES | ||
| Mission 119 | Nightmare | 77 | 122 | 90 | - | ||
| Mission 120 | Nightmare | 77 | 122 | 90 | - | ||
| Mission 121 | Normal | 77 | 122 | 90 | - | ||
| Mission 122 | Normal | 77 | 122 | 90 | YES | ||
| Mission 123 | Hard | 77 | 122 | 90 | - | ||
| Mission 124 | Normal | 77 | 122 | 90 | - | ||
| Mission 125 | Normal | 77 | 122 | 90 | - | ||
| Mission 126 | Hard | 106 | 168 | 90 | - | ||
| Mission 127 | Normal | 106 | 168 | 90 | - | ||
| Mission 128 | Nightmare | 106 | 168 | 90 | - | ||
| Mission 129 | Normal | 106 | 168 | 90 | - | ||
| Mission 130 | Normal | 106 | 168 | 90 | |||
| Mission 131 | Hard | 106 | 168 | 90 | |||
| Mission 132 | Normal | 106 | 168 | 90 | |||
| Mission 133 | Easy | 106 | 168 | 90 | |||
| Mission 134 | Hard | 106 | 168 | 90 | |||
Location 8
Has a total of 24 rating stars.
| Unlock Requirements | |
|---|---|
| Stage Unlock | 280 stars |
| Missions | Difficulty | First Clear Rewards | Subsequent Clear Rewards | Hidden items | |||
|---|---|---|---|---|---|---|---|
| Gold | Survival Points | Power Points | Gold | Survival Points | |||
| Mission 135 | Nightmare | 153 | 168 | 105 | - | ||
| Mission 136 | Nightmare | 153 | 168 | 105 | YES | ||
| Mission 137 | Hard | 153 | 168 | 105 | - | ||
| Mission 138 | Nightmare | 153 | 168 | 105 | - | ||
| Mission 139 | Hard | 153 | 168 | 105 | - | ||
| Mission 140 | Normal | 153 | 168 | 105 | YES | ||
| Mission 141 | Normal | 153 | 168 | 210 | - | ||
| Mission 142 | Nightmare | ||||||
| Game Info | |
|---|---|
| Main mechanics | Units • Status Effects • Resources • Enemies • Locations • Bus • Van • Daily Gifts • Buffs • Daily Tasks • Weather • Level Data • Star Reward |
| Unit Mechanics | Unit Stats • Perks • Team Powers |
| Items | Upgrade Items • Item Data • Collectibles • Skins • Resources |
| Modes | Events • Skirmish • Supply Runs • Infected Metro |
| Trading | Trader • Special Offers • Currencies |
| Lore | Story • Blue Energy • Factions • Minor Characters |
| Media | Cutscenes • Soundtrack • Changelogs |
| Legacy | Roulette • Upgrade Items (Legacy) • Military Case • Old Offers |

